
Reviewed · SELF-GUIDED TOURS
Bristol Harbourside Self-Guided Walking Tour
Bristol’s waterfront tells a story at walking pace. This self-guided route is built around Helen’s human audio guide, plus maps and GPS directions in the app, so you can wander the harbourside and squares without trying to read every sign. I love that most stops are free to enjoy, and you get quick context at each one, from why Pero’s Bridge has horn-shaped sculptures to what the Redcliffe rocks are telling you. One thing to consider is that because it is self-guided, you should plan a little extra time and rely on your phone map, since street access and directions can be tricky.
You’re basically walking a loop through the city’s rivers, docks, churches, and viewpoints, ending at Brunel’s SS Great Britain. The price feels fair for what you get, especially with 3 weeks unlimited access to the tour in the app, offline-friendly audio support (as provided), and a private format where only your group participates. The possible drawback: one past participant found the navigation harder than expected, with some streets that were hard to follow or access, which made the walk longer than advertised.
In This Review
- Key Points I’d Prioritize Before You Go
- Price and Value: Why $12.33 Can Make Sense Here
- Getting Started With the App, GPS, and Helen’s Audio
- Walking the Harbourside on a 2 to 3 Hour Pace
- Stop-by-Stop: Millennium Square to College Green
- Stop-by-Stop: King Street, Queen Square, Welsh Back, and Castle Park
- Stop-by-Stop: Bridge Quay, St Mary Redcliffe, and the Redcliffe Caves
- Stop-by-Stop: Bathurst Basin, Princes Wharf, and M Shed
- Stop-by-Stop: Wapping Wharf and the Finish at SS Great Britain
- Practical Tips That Keep This Tour Fun (Not Frustrating)
- Who This Self-Guided Bristol Walk Fits Best
- Should You Book This Bristol Harbourside Self-Guided Walking Tour?
- FAQ
- How long is the Bristol Harbourside self-guided walking tour?
- What is the price per person?
- Is the tour guided by a person in real time?
- What language is the audio tour offered in?
- Is M Shed included, and is it free?
- Is there a refund if I cancel?
Key Points I’d Prioritize Before You Go
- Helen’s audio guide (not a computer voice) keeps the walk moving with real storytelling.
- 3 weeks unlimited app access means you can retry if you miss a turn or want to linger.
- Most stops are free so your money goes to time in Bristol, not extra tickets.
- GPS route and stop maps help you connect each viewpoint to the bigger story.
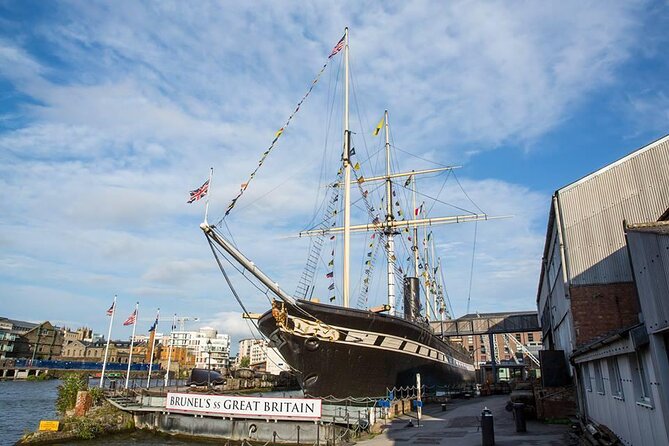
- A strong finish at Brunel’s SS Great Britain gives you a meaningful end point and something tangible to see.
Price and Value: Why $12.33 Can Make Sense Here
At $12.33 per person, this is a budget-friendly way to get structure on a Bristol walk without paying for an in-person guide. The value is not just the walking, it’s the way the app packages context, maps, and stop-by-stop audio so you are not guessing what you are looking at.
Most of the featured stops are marked as free to access, from Millennium Square through College Green, then down to the docks and harbourside sites. That matters because you can spend your money on food or a museum add-on, not on entry fees for every stop.
My practical take: if you like walking with a plan but you do not want someone talking at you in real time, this kind of self-paced audio tour is a good deal.
More England on foot, brolly optional:
Getting Started With the App, GPS, and Helen’s Audio
You start at the Plus Code location listed for Bristol, UK, then finish at Brunel’s SS Great Britain at Great Western Dockyard on Gas Ferry Road. Before you go, you’ll activate the tour using instructions emailed to you after booking, and you’ll want to check the ticket’s Before You Go section.
Once you start, the app provides the map, directions, and a GPS route with stops. Helen guides you through the audio guide, and importantly, it is described as audio from Helen, not a computer-generated voice. Expect videos, pictures, and recommendations tied to the route so you can make smart choices about what to look at and where to pause.
If you want to avoid the one big self-guided problem, do this: start with a charged phone and take 2 minutes to confirm GPS is working before you set off. Then keep an eye on the next stop name as you walk, because one past participant reported navigation issues like street names not being clear and access being blocked in places, which can stretch the time.
Walking the Harbourside on a 2 to 3 Hour Pace
Plan on around 2 to 3 hours, but treat it as a guide, not a promise. This route hits a mix of open plazas, viewpoints, and streets that can involve small climbs and turns, and you’ll likely pause at several stops for photos or reading.
The stop times listed are short, often around 5 to 15 minutes each, but the real experience depends on how often you stop. If you are the type who turns a corner and immediately wants to look both ways like a local, give yourself a small buffer so you do not feel rushed.
One more practical note: Bristol weather changes fast. If rain rolls in, you’ll appreciate having an audio guide that lets you keep going while you decide whether to duck into a free museum like M Shed.
Stop-by-Stop: Millennium Square to College Green
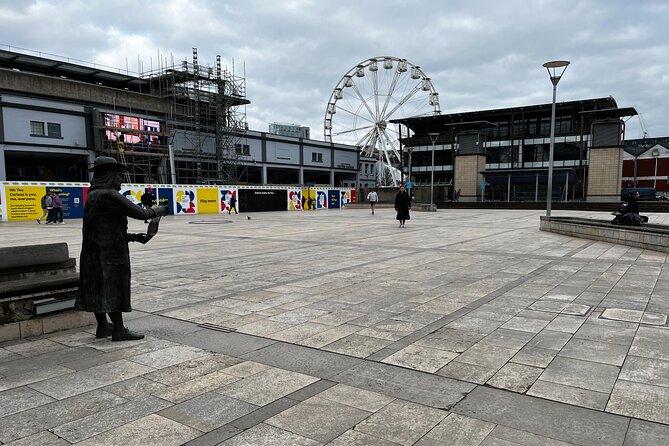
1) Millennium Square (Canon’s Marsh site)
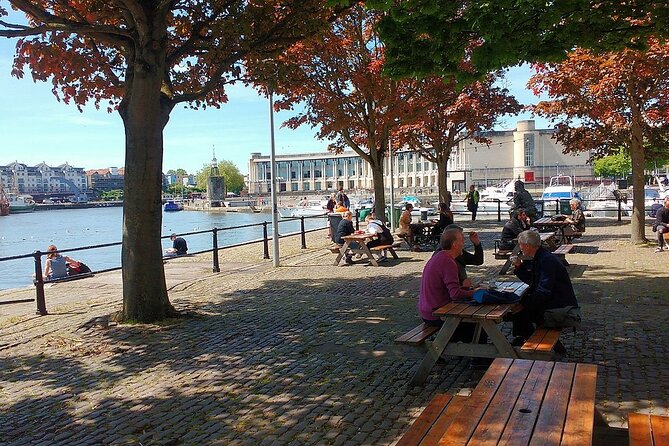
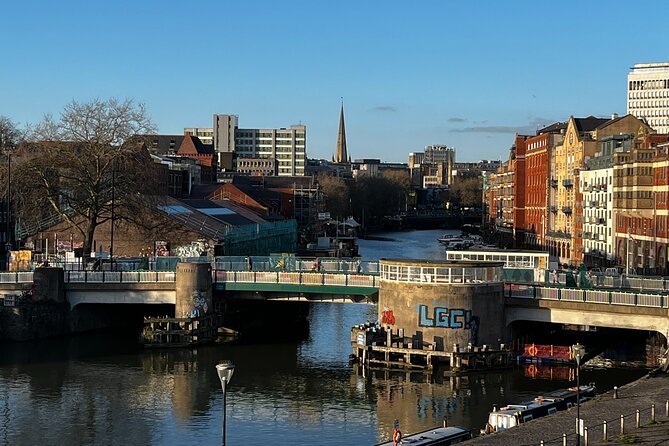
You begin at Millennium Square, built on a former marshy area known as Canon’s Marsh. This land was drained and developed in the early 1700s, right where the river Frome (coming from the north-east) joins the Avon (from the east). The audio here helps you visualize how the city used to sit differently than it does today.
2) Bristol Amphitheatre and Waterfront Square
Next up is the waterfront-side amphitheatre, popular with skateboarders. You might see riders here, and the contrast is part of the story: this is one of those Bristol areas where skateboarders are able to ride, while other places use anti-skateboarding architecture. It’s a small stop, but it makes the city feel lived-in rather than museum-only.
3) Pero’s Bridge
Pero’s Bridge opened in 1999 and is named in honour of an important local figure in Bristol. Helen’s audio explains who that person was and why the bridge features a pair of horn-shaped sculptures. Even if you only glance at the structure at first, this is one of those spots where the explanation makes the design click.
4) Where the rivers met, marked by today’s fountains
Between Pero’s Bridge and College Green, you get a Middle Ages harbour story tied to the confluence of the rivers Avon and Frome. The tour points you to the approximate location of today’s fountains, so you understand that you are standing near a place where a working harbour once developed along the riverside. It’s a great “wait, so that’s what this spot used to be?” moment.
5) College Green
College Green is a gathering place, and the stop is stacked with meaning in a small area. You’ll learn about an important church (Abbey), works of art by a very famous artist, another chapel, and a museum nearby. If you like mixing architecture with art, this is a solid segment to linger for an extra 10 minutes.
Stop-by-Stop: King Street, Queen Square, Welsh Back, and Castle Park
6) King Street
King Street would once have been busy with ship captains, traders, and ship workers moving goods between boats and stores. Helen’s stories make the street feel functional, not just pretty. Close your eyes for a minute and picture the rhythm of loading and unloading, then open them again and look at the modern street life.
7) Queen Square
Queen’s Square is Georgian, surrounded by trees and cobbled streets. It started as marshland used for dumping rubbish and even weaponry practice, and houses began appearing from 1699 starting on the south side of the square. This is another “Bristol has layers” stop, but told in plain terms, not academic lectures.
8) Welsh Back
Then you reach Welsh Back, still busy today, especially in the evenings. The audio focuses on the unusual name and what it reveals about the area’s history, so you are not just walking through restaurants and bars, you’re reading the place with your ears turned on.
9) Castle Park
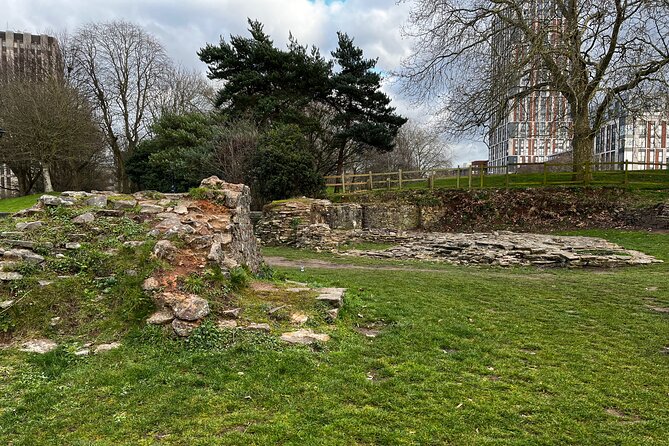
Castle Park is tied to the old castle site and Bristol’s medieval settlement. It’s brief, but it sets up the next stretch by framing the city’s older power and defense in a place you can quickly scan with your eyes.
Also on in Bristol, no fuss
- Bristol Street Art: Banksy Exploration Game and Tour★ 3.5 · 39 reviews
- Brunel’s Bristol: A Self-Guided Tour from SS Great Britain to Clifton Bridge★ 4.5 · 11 reviews
- Secrets of Bristol Waterfront: Self-Guided Puzzle Adventure★ 3.5 · 5 reviews
- Bristol Quest: Self Guided City Walk & Immersive Treasure Hunt★ 4.5 · 3 reviews
Stop-by-Stop: Bridge Quay, St Mary Redcliffe, and the Redcliffe Caves
10) Bridge Quay viewpoint
At Bridge Quay, you get a view that lines up Bristol Bridge with three churches in the background: St Peter’s, St Nicholas’, and St Mary Le Port. The tour also connects Bristol Bridge to the belief that the settlement of Bristol began there. This is where slowing down helps, because the view is the point, not just the facts.
11) St Mary Redcliffe Church
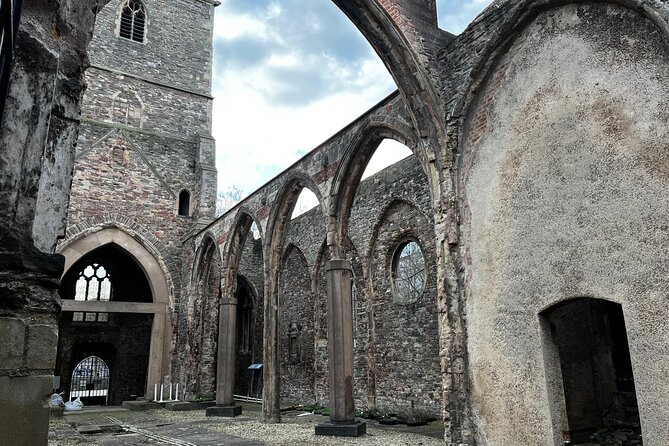
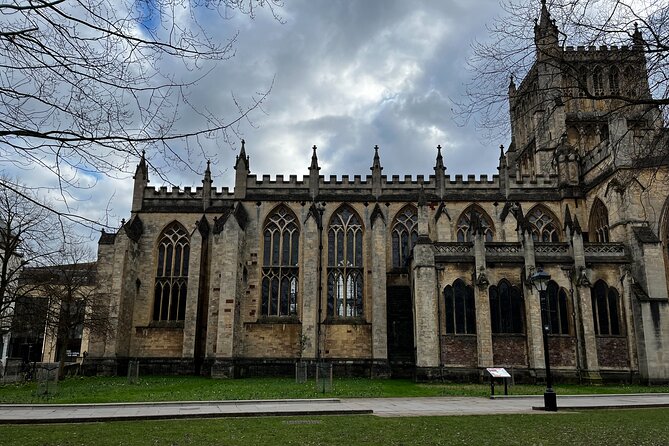
St Mary Redcliffe is in the Redcliffe area, and the tour explains that the church you see is not the original one. The church from Henry I’s time fell into disrepair and was rebuilt in the 14th century. If you like architectural timelines, this is one of the clearer “then and now” lessons.
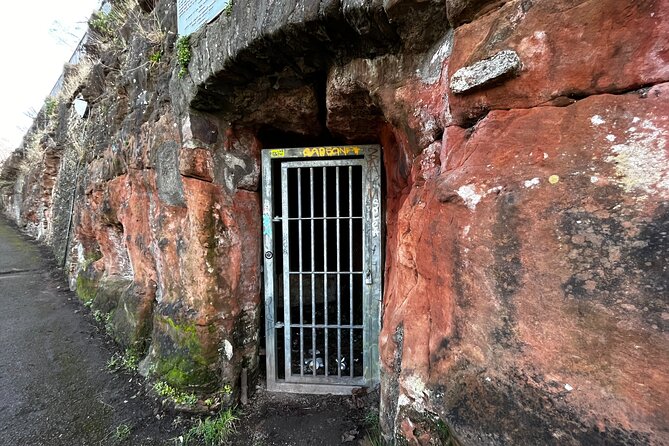
12) Redcliffe Caves
Redcliffe gets its name from bright red Triassic sandstone rocks you can see from where you’re standing. The houses along Redcliffe Wharf are built above a cave system that runs back toward St Mary Redcliffe church. This stop is fascinating because it connects geology to everyday living, and you get to picture the built environment working around something older than the buildings.
Stop-by-Stop: Bathurst Basin, Princes Wharf, and M Shed
13) Bathurst Basin and the Ostrich pub
The tour points out Bathurst Basin lost its water supply after the New Cut was dug in 1809. You also learn that the Ostrich pub at the entrance was built around 1745, once used by sailors, dock workers, and merchants. This is a “how did work and water interact” moment that makes the docks feel practical.
14) Princes Wharf
Princes Wharf is now very different from its cargo ship past, since most Bristol docks are closed to cargo ships today. But if you look closely, the tour suggests you can spot evidence of the docks when they were thriving. This stop works best if you keep your eyes open for details and use the audio as your guide to what to notice.
15) M Shed
M Shed is a free-to-enter museum, and it is described as one of the few harbourside areas that retains original features. It’s worth using some of your time here if you enjoy museums that do not feel like homework. Even a short visit can add weight to everything you just walked past.
Stop-by-Stop: Wapping Wharf and the Finish at SS Great Britain
16) Wapping Wharf
Wapping Wharf was used for shipbuilding and repair, and the tour reminds you it was not always as pleasant as it feels today. In the 1800s, Bristol Docks were packed with boats loading and unloading goods. The best way to enjoy this stop is to treat it like a background chapter, then carry it into the finale.
17) The SS Great Britain and Brunel’s legacy
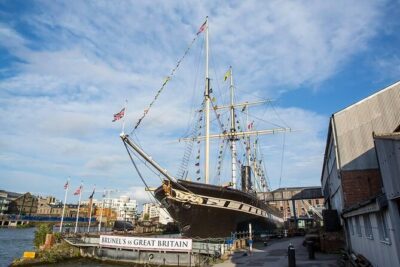
Your walk ends at Brunel’s SS Great Britain at Great Western Dockyard. The tour highlights that this ship was built here by Isambard Kingdom Brunel, described as the largest ever and the first ship constructed using iron. When it launched in 1843, it was said to be the greatest experiment since creation. That last line is big, but the point is simple: the place you finish is not only scenic, it is technological history you can actually stand beside.
If you still have energy, use the end point wisely: let the audio stories carry you to the ship, then slow down and look for what makes it different from later wooden and iron ships. This is where your walk turns into something you can keep in your memory.
Practical Tips That Keep This Tour Fun (Not Frustrating)
- Use your phone as a tool, not a guess. Confirm GPS at the start so you do not drift when a street feels similar to the next one.
- Plan a buffer. One past participant had detours and time overruns due to navigation and access issues, so I suggest adding 30 to 45 minutes if you’re on a tight schedule.
- Wear shoes for cobbles and sidewalks. You’ll move through squares with cobbled streets and waterfront paths, so comfort beats fashion here.
- Take short pauses. Many stops are designed for quick, meaningful context. If you try to sprint through them, you lose the point of the audio.
- Finish strong at SS Great Britain. If you only have time for a light museum stop, make it M Shed since it is free to enter.
Who This Self-Guided Bristol Walk Fits Best
This tour suits you if you want a structured walk that is mostly free to experience, and you enjoy stories tied to specific places. It also works well when you prefer flexibility, because you can pause for photos, duck into M Shed, or linger at views like Bridge Quay.
If you need turn-by-turn precision like a live guided group, you might find the self-guided format challenging, especially if you rely on street signs more than GPS. In that case, bring patience, keep your phone ready, and give yourself extra time.
Should You Book This Bristol Harbourside Self-Guided Walking Tour?
I think it is worth booking if you want a low-cost way to connect Bristol harbourside landmarks into one readable story, with Helen’s audio keeping you pointed in the right direction. The value is strong because you pay once, then get 3 weeks of access to the app, plus a mostly free route that culminates in a major sight at SS Great Britain.
Skip it only if you strongly dislike self-guided navigation and you need very exact street-level instructions with minimal phone use. If that sounds like you, consider choosing an in-person tour instead. Otherwise, bring comfy shoes, start with GPS confirmed, and let the route do the guiding while you focus on what Bristol looks like when you walk it.
FAQ
How long is the Bristol Harbourside self-guided walking tour?
It is listed as about 2 to 3 hours.
What is the price per person?
The price is $12.33 per person.
Is the tour guided by a person in real time?
No. It is self-guided with an audio guide in the app, voiced by Helen, plus maps, directions, and GPS route information.
What language is the audio tour offered in?
The tour is offered in English.
Is M Shed included, and is it free?
M Shed is included as a stop, and it is described as free to enter.
Is there a refund if I cancel?
This experience is non-refundable and cannot be changed for any reason, so the amount you paid will not be refunded if you cancel or ask for an amendment.
Latest to join the queue for Bristol






Self-Guided Tours, compared.

Golden Tours York Hop-on Hop-off Open Top Bus Tour with Audio Guide
Read our review →
Windsor Castle Tour from London with Transportation & Audio Guide
Read our review →
London Panoramic Open Top Bus Tour with Audio Guide
Read our review →
Romans, Vikings and Medieval York: An Audio Tour
Read our review →
Emirates Stadium and Arsenal Museum Entrance Ticket Including Audio Guide
Read our review →
Private Self-Guided Dinky Door Hunt in Cambridge
Read our review →
Natural History Museum Express Guided Tour & Audio Guide
Read our review →Browse the lists this tour appears in