
Reviewed · WORKSHOPS
London Photography Masterclass – Private Photography Lesson
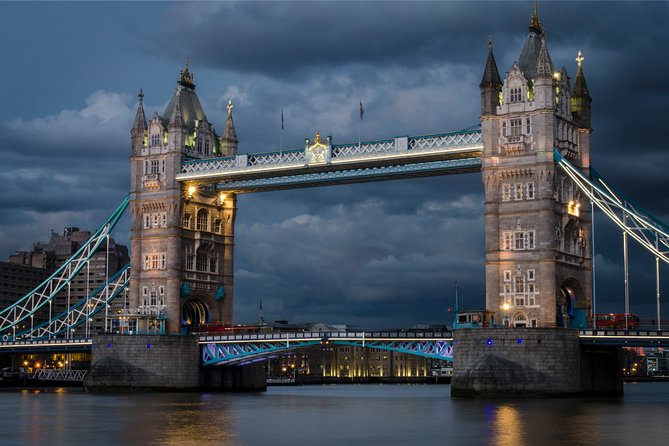
London at night is a photo school. This private 3 hour lesson in central London helps you aim beyond postcards, using long exposure tricks, light trail ideas, and one on one coaching. I especially like how the route lines up big landmarks with Thames reflections, and how guides like Rose, Derrick, and Noemi stay patient while pushing you toward your best frame.
The one drawback to plan around is equipment. A camera and tripod are not included, so if you do not already have them (or you hate lugging them), your results may feel limited.
In This Review
- Quick takeaways (the stuff that matters)
- London Night Shots, the Private Way
- Price and What Comes With a 3-Hour Lesson
- Camera Basics You Can Practice During the Walk
- Route Notes: Westminster Bridge to Tower Bridge at Night
- Westminster Bridge, and the river’s reflection problem
- Palace of Westminster, practicing framing and contrast
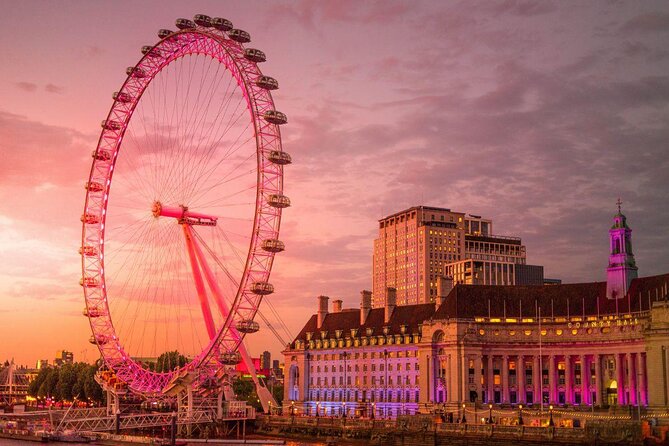
- London Eye, learning how skyline lights behave
- Household Division, using texture and structure
- Waterloo Bridge, turning movement into lines
- Southbank, riverfront variety and creative angles
- Millennium Bridge, practicing patience and steadiness
- St Paul’s Cathedral, a “make it dramatic” challenge
- The Shard, skyline contrast and bold silhouettes
- Tower Bridge, tying the whole lesson together
- How the Photographer Teaches and Reviews Your Photos
- Rain, Timing, and Why the 3 Hours Feel Enough
- Who This Fits Best, and Who Might Skip It
- What to Bring for Long Exposures and Light Trails
- Should You Book This London Photography Masterclass?
- FAQ
- How long is the London Photography Masterclass?
- Is this a private lesson?
- What is included in the price?
- Do I need to bring a camera or tripod?
- Where does the tour start and end?
- What is the cancellation policy?
Quick takeaways (the stuff that matters)
- Private coaching for real questions, so you are not stuck guessing settings while everyone else shoots
- Night techniques you can use immediately, including long exposure, light trails, light painting, and higher ISO shooting
- Landmark to landmark views, from Westminster Bridge and St Paul’s to the Shard and Tower Bridge
- Your shots get reviewed, which helps you fix what is not working instead of hoping it improves later
- Rain does not stop the lesson, and the guides know how to keep you shooting when London gets messy
London Night Shots, the Private Way
There is a special kind of frustration in sightseeing with a camera. You see the scene, you press the shutter, and then you wonder why the image looks flat or blurry, even though the view looked amazing in person.
This 3 hour private session is built to solve that. You are not just walking through famous places, you are learning how to control the hard parts of night photography, from exposure time to ISO. The best part is that it is one on one instruction, so you can ask the exact thing that is blocking you. One guide will slow down and explain it from the ground up, while another will challenge you to go further than good enough.
The routes they use make sense for learning. Bridges, government buildings, riverfront angles, and skyline icons all come with built in subjects: bright lights, strong geometry, and reflections on water. That is ideal for practicing long exposures and getting light trails that look intentional instead of accidental streaks. It is also ideal for learning composition, because you can compare shots from nearby positions as your guide helps you frame the same scene three different ways.
Also on in London, no fuss
Price and What Comes With a 3-Hour Lesson
At $218.21 per person for about three hours, you are paying for two things: access to a guide who can coach your camera settings, and a focused plan that puts you on the right streets for night shots.
Here is what you actually get as part of the experience:
- A professional photographer guide
- A local guide who helps you navigate the area
- Photography tuition and review during the session
What is not included matters because it affects value. A camera and tripod are not provided. That is not a deal breaker, but it does mean the lesson is most cost effective if you already own or can borrow the basics. If you are renting equipment anyway, factor that in. If you already have your camera, this starts to feel like a pretty straightforward “pay for coaching and time” situation.
Also, this is private. That tends to cost more than group classes, but it gives you something groups struggle to deliver: feedback on your specific images and your specific mistakes. The coaching style in particular has been described as patient, with guides pushing you beyond average results rather than letting you stop at the first usable shot.
Camera Basics You Can Practice During the Walk
This class is clearly aimed at night photography, so you will work on techniques that are hard to learn from trial and error. The big topics include:
- Long exposure shooting
- Light trails (using movement and shutter time)
- Light painting (working with controlled light effects)
- High ISO shooting (for low light without losing too much detail)
Even if you already know some camera basics, night brings a new set of problems. Auto mode often fails because the camera has to guess in a scene full of bright lights and dark shadows. What you want is repeatable control. That is why guides in this program tend to focus on how settings change the result.
In particular, Noemi’s approach is described as breaking down how ISO, f numbers, and exposure times affect your final photo. That kind of cause and effect is exactly what you want when you are trying to repeat a successful shot rather than chase luck.
The “review” part is what makes the lesson feel efficient. Instead of only teaching concepts, the session includes picture checking as you shoot. That helps you catch issues like a too dark frame, blown highlights, or a shutter time that turns a light trail into messy noise.
Route Notes: Westminster Bridge to Tower Bridge at Night
You start near St Thomas’ Hospital / County Hall, at Stop D (London SE1 7EP). You end back at the meeting point, so you are not left stranded with your camera gear and a half planned return.
The route is packed with major symbols, but it is also smart for night practice because each stop offers different lighting and angles. Here is how to think about what you are shooting at each one.
Westminster Bridge, and the river’s reflection problem
At Westminster Bridge, you can practice long exposure on a subject that mixes bright building lights with dark water. Look for compositions where the structure stays sharp while the river reflections add texture. This is the kind of spot where a small change in exposure time can swing your photo from crisp to cloudy.
If you are new to long exposure, start by bracketing your settings and watching the histogram or exposure behavior. Your guide can help you choose a starting point so you do not waste half the night guessing.
While the kettle’s on in London:
- Stonehenge, Windsor Castle, and Bath from London★ 4.5 · 18,662 reviews
- London Big Bus Hop-On Hop-Off Tour with Optional River Cruise★ 3.5 · 10,803 reviews
- London Small Group Tour of Historical Pubs★ 5.0 · 10,422 reviews
- Stonehenge, Windsor Castle and Bath with Pub Lunch in Lacock★ 4.5 · 7,402 reviews
Palace of Westminster, practicing framing and contrast
At the Palace of Westminster, you are working with strong lines and high contrast. The challenge at night is often not “where is the subject” but “how do I keep highlights from blowing out while still capturing the mood.”
This stop is a good place to practice light trail thinking too. If the traffic and lights are moving, you can use shutter time to turn scattered movement into cleaner streaks that support the composition.
London Eye, learning how skyline lights behave
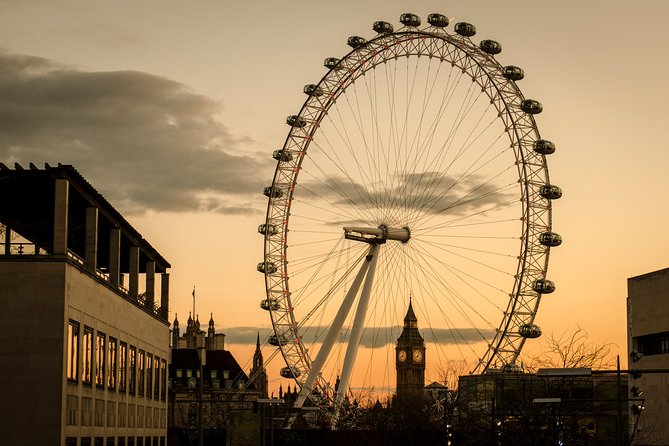
At London Eye, the glow of signage and bright points gives you practice controlling noise and exposure. Skyline lights can trick your camera into underexposing the darker areas, so you will likely experiment with ISO and shutter time.
If you want images that feel sharp rather than grainy, this is where the high ISO lessons can pay off. Your guide can help you pick a balance so the night stays night, without the photo falling apart.
Household Division, using texture and structure
The Household Division area adds more classic architectural texture to your frames. At night, these scenes can look flat if you do not intentionally compose for depth. Try to include foreground elements and aim for separation between lights, building edges, and the darker background.
This stop is also a great time to ask questions, because it is easy to try one adjustment, take a shot, and immediately compare results.
Waterloo Bridge, turning movement into lines
At Waterloo Bridge, the idea of light trails becomes easier to practice because you have bridge geometry plus street and vehicle light movement. If you are going for clean streaks, the key is keeping your shutter time intentional and your camera steady.
This is a good place to slow down and test. If your streaks are too thick or too faint, your guide can help you correct the settings quickly rather than spending 30 minutes stuck.
Southbank, riverfront variety and creative angles
At Southbank, you get a lot of variety. The lighting changes, the viewpoints shift, and you can try different framing styles while still staying in the night photography “zone.”
If your goal is “London feels like London,” this is where you can get shots that look atmospheric without just being a blur. The key is balancing exposure so the highlights keep detail, and the shadows keep some character.
Millennium Bridge, practicing patience and steadiness
At Millennium Bridge, the lights and spacing can make your long exposure results look either elegant or messy depending on steadiness and timing. If you have a tripod, this is a great spot to use it properly and give your camera enough time to work.
If you do not have a tripod, you can still learn, but you need more careful technique. The guide can show you how to hold the camera and manage shutter speed so your images are not just technical failures.
St Paul’s Cathedral, a “make it dramatic” challenge
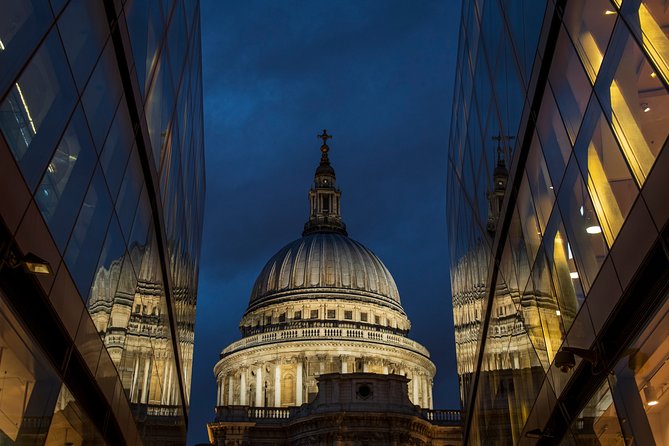
At St Paul’s Cathedral, your night photography becomes more about storytelling. The cathedral can swallow your subject if exposure is wrong, or it can look too washed out if the brightest lights dominate.
This stop is a classic moment for composition. Your guide can help you find an angle where the cathedral becomes the hero, while the surrounding lights support the scene rather than competing with it.
The Shard, skyline contrast and bold silhouettes
At The Shard, you get a tall, sharp silhouette. That is useful for learning how contrast changes night photos. The Shard’s lighting and surrounding glow help you practice keeping your subject recognizable at the same time you manage the exposure.
This is also a good stop for experimenting with higher ISO if you are trying to capture more detail in darker areas. High ISO is a tool, not a guarantee, and coaching helps you use it without turning the image into noise soup.
Tower Bridge, tying the whole lesson together
Finally at Tower Bridge, you can connect your night techniques across the whole route. You have a landmark with bright lighting and strong reflections. It is an excellent place to do your “final set” because by then you understand what settings are working for you.
Your guide can help you pick the strongest version of your series: the shot where lines lead the eye, highlights look controlled, and the reflections make the frame feel alive.
How the Photographer Teaches and Reviews Your Photos
A good photography workshop does two things. It gives you instruction, and it forces feedback fast.
This session includes photography tuition and review, which means you do not just learn, shoot, then hope. The coach checks your images and helps you adjust your approach during the same walk. That is why people highlight the coaching style, like Derrick taking time to understand what each person cared about and then pushing them to go beyond good enough to get the best image. That push matters, because night photography rewards the person who iterates instead of the person who only fires one “safe” photo.
Rose is described as tailoring the session to what someone already knows, including suggesting locations and views that stretched creativity beyond the usual tourist patterns. That is valuable if you feel stuck shooting the same angles every trip. It also helps if you have more experience and you want the workshop to challenge you.
Noemi’s strength, based on the feedback you can use as a guide for your expectations, is explaining how ISO, f numbers, and exposure time actually change your results. If you like understanding the why, you should feel at ease asking questions like:
- Why is this photo too bright in highlights?
- Why do my light trails look messy?
- How much ISO is too much for this lighting?
Rain, Timing, and Why the 3 Hours Feel Enough
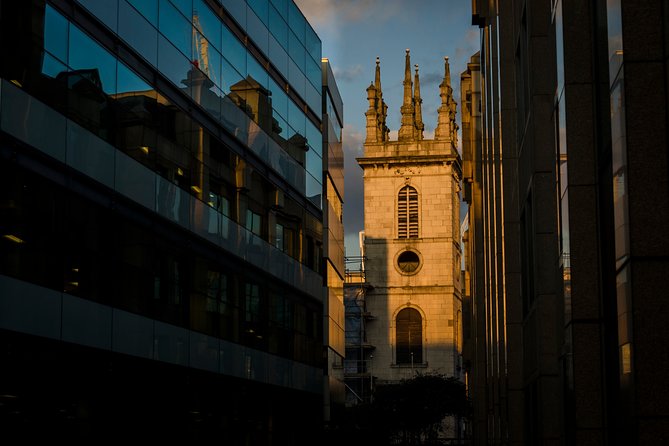
London nights can be unpredictable. One person described a rainy, messy day and still coming away with images they felt proud of. That tells me the lesson is built to keep moving even when conditions are not perfect.
You should still plan mentally for damp streets, changing light, and the fact that night photography takes time to set up. The session is only about three hours, so you want to treat it like a focused sprint, not an all-night wander. If you show up with a camera you already know how to use, you will squeeze more learning out of each location.
Walking between iconic points also means you are never stuck in one spot long enough for your excitement to fade. If you prefer sitting still, this might not match your style, but the variety of lighting across the route is exactly what makes the technical practice worth it.
Who This Fits Best, and Who Might Skip It
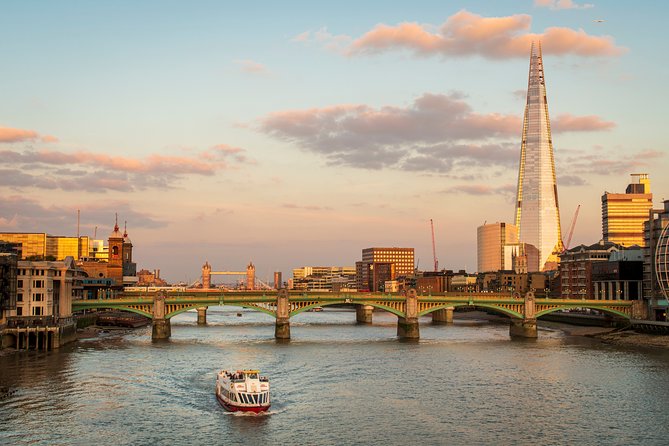
This experience is best for you if you want night photos and you want instruction, not just time in front of a camera.
It is a strong match if:
- You want to improve long exposure and light trail results
- You like one-on-one guidance and want to ask many questions
- You are tired of getting technically “okay” photos and you want more control
- You want a route you might not discover on your own, especially at night
It may not be ideal if:
- You do not have a camera and tripod option and you are not willing to borrow or rent
- You hate moving around in an urban setting while shooting
- You expect the lesson to be a casual stroll with no technical focus
Most people can participate, and the session is in English. Since it is private, it will be only your group, which is great for couples, small groups, and anyone who wants personalized feedback instead of waiting for a slow tour pace.
What to Bring for Long Exposures and Light Trails
The practical part is simple: bring what lets you put the lesson into action.
Based on what the session teaches, you should plan on:
- Your camera (not included)
- A tripod (not included)
- Something warm for night walking, especially if you are doing longer exposures
You will get the most out of it if you can stabilize your camera and take test shots quickly. If your tripod is bulky, think about how you will carry it, but since tripod use is part of the night photography focus, it is worth prioritizing.
If you are unsure what to set before you go, at least bring a camera manual or be ready to explain what settings you normally use. One-on-one instruction works best when you can say what you are trying to achieve.
Should You Book This London Photography Masterclass?
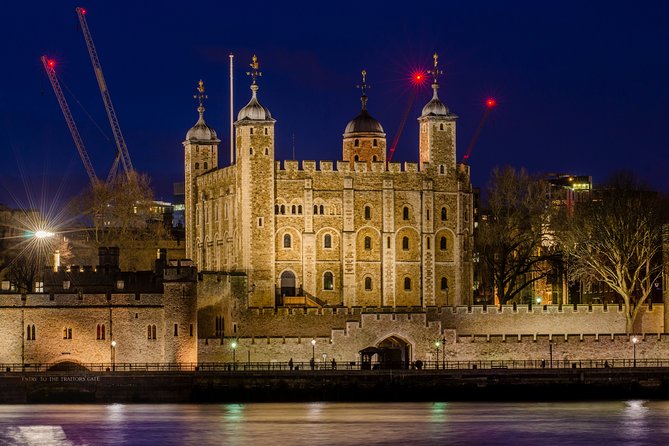
Book it if you want London at night, but you also want the photos to look like you planned them. The private format, the photography review, and the emphasis on the hard skills like long exposure and light trail control make this feel like a real shortcut to better images.
Skip it if you are going to treat it like a sightseeing walk with a camera. This class is clearly about mastering night photography, so you will get more value if you show up ready to learn settings, test quickly, and ask questions when your results do not match your vision.
If you are on the fence, here is my rule of thumb: if you care about getting strong night shots for your trip memories, this is a smart use of a few hours in London.
FAQ
How long is the London Photography Masterclass?
The tour lasts about 3 hours.
Is this a private lesson?
Yes. It is private, so only your group participates.
What is included in the price?
It includes a professional photographer guide, a local guide, and photography tuition and review.
Do I need to bring a camera or tripod?
Yes. A camera and tripod are not included.
Where does the tour start and end?
It starts at St Thomas’ Hospital / County Hall (Stop D), London SE1 7EP, UK, and ends back at the meeting point.
What is the cancellation policy?
You can cancel for a full refund up to 24 hours in advance. If you cancel less than 24 hours before the start time, the amount you paid is not refunded.
Latest to join the queue for London

Workshops, compared.

Chocolate Bar Making Workshop – York Cocoa Works
Read our review →

Street Art Tour and Spray Painting Workshop in London
Read our review →Browse the lists this tour appears in